AWS Elastic Cloud Compute
Everything you need to know about an AWS EC2 instance.


On this page (3)
AWS Elastic Cloud Compute Instance #
- Elastic Cloud Compute is abbreviated as EC2.
- It is an IaaS cloud offering by Amazon.
- Using EC2 Instance, we can configure the machine from scratch, like a building a custom PC. But here it is done virtually by making few clicks.
- EC2 Instance configurable components
-
Operating System(OS)
- Example: Ubuntu, Windows, MAC.
-
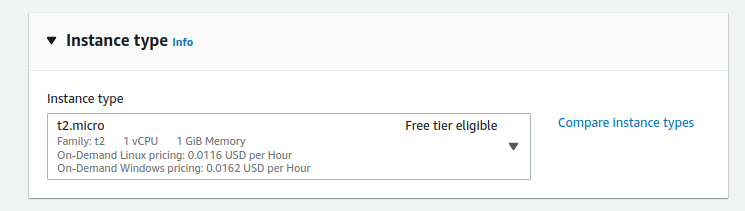
Instance type
- Here we define CPU computing hardware requirements.
- vCPU
- Memory
- Instance Storage type, etc.
- Here we define CPU computing hardware requirements.
-
Instance configuration
- No. of Instances
- Network related configuration, etc.
-
Storage
- Size
- Volume type
- Encryption, etc.
-
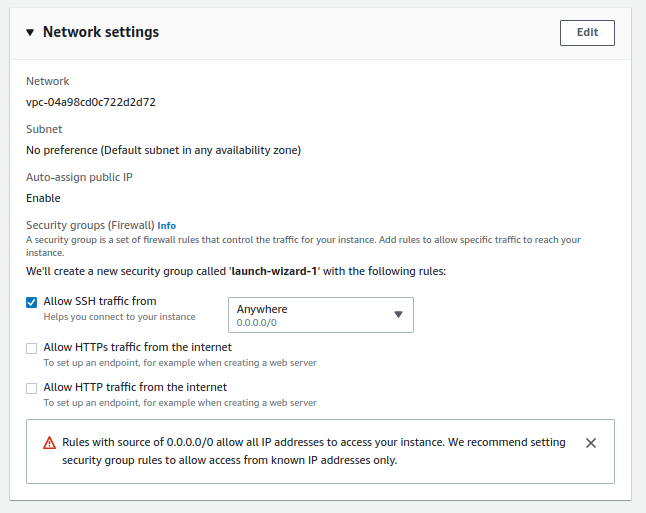
Security Group
- In a nutshell, it is a set of firewall conditions used to control the Instance traffic.
-
How to Launch an EC2 Instance #
-
Prerequisite
Amazon Web Services(AWS) account.
-
Steps
-
Login to your AWS account.
-
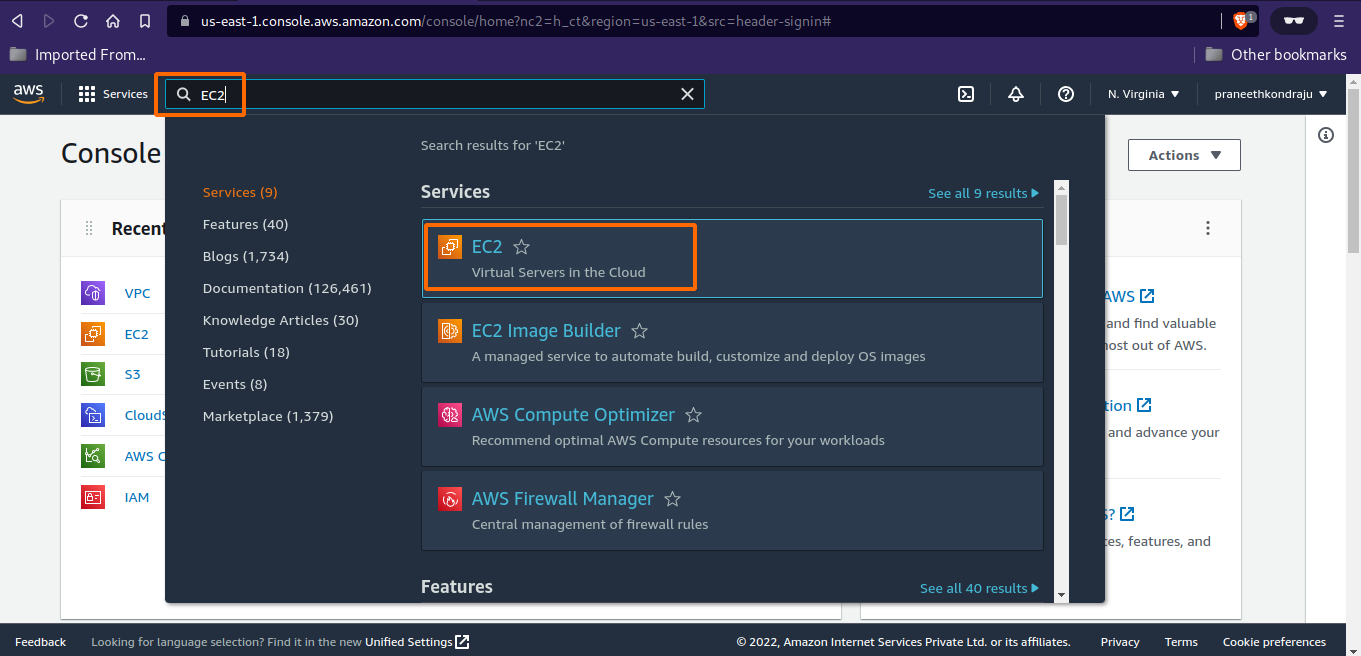
Click on Search bar and type EC2. Select EC2.
-
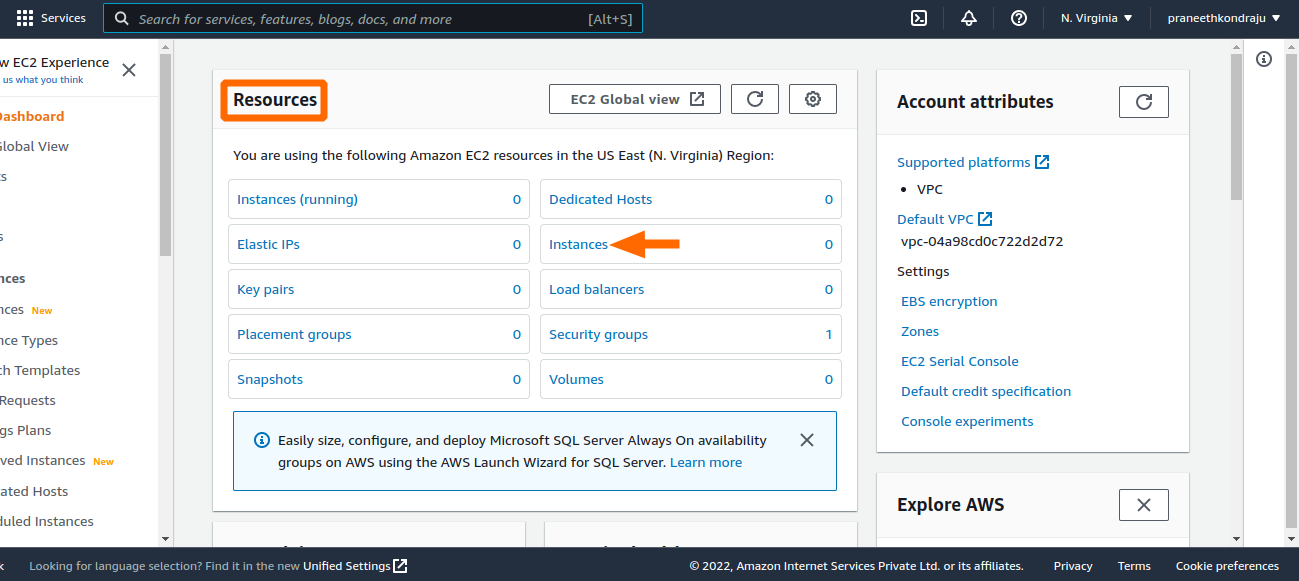
You will be landed into EC2 Dashboard page. Select Instances.
-
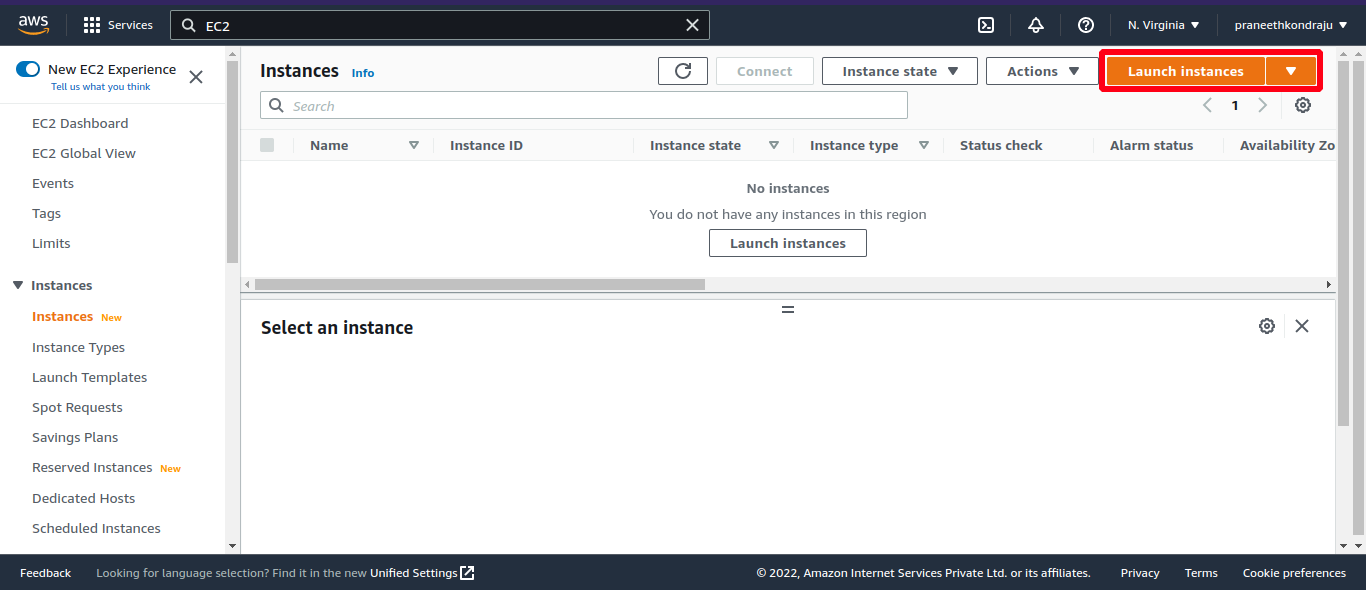
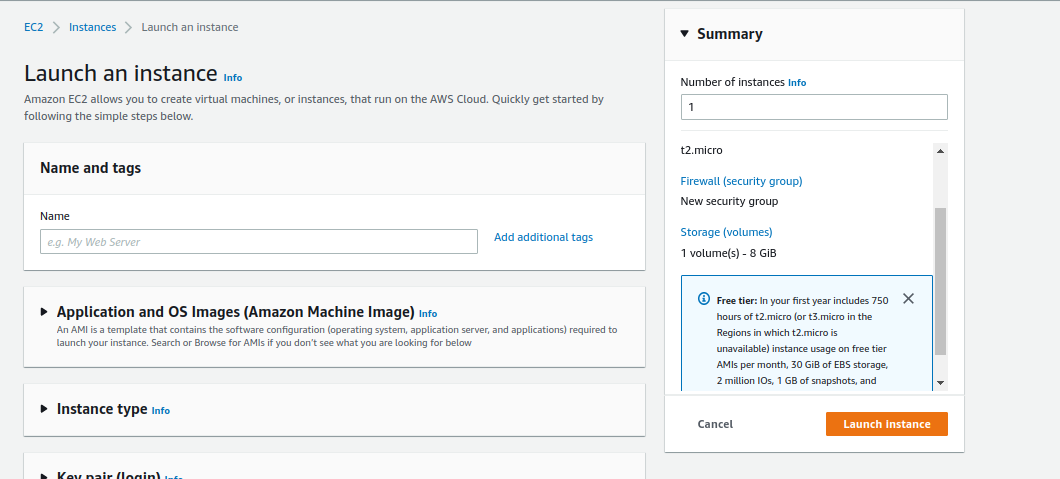
Select Launch Instances.
-
Based on opted user experience, creation of EC2 differs.
a. If user opted for New Experience.
-
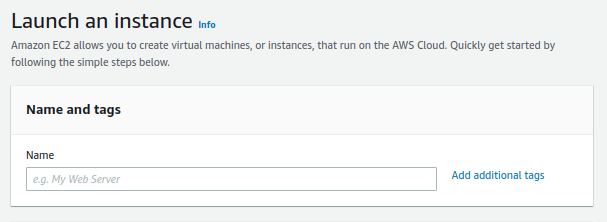
Scroll down the Launch an Instance page to navigate.
-
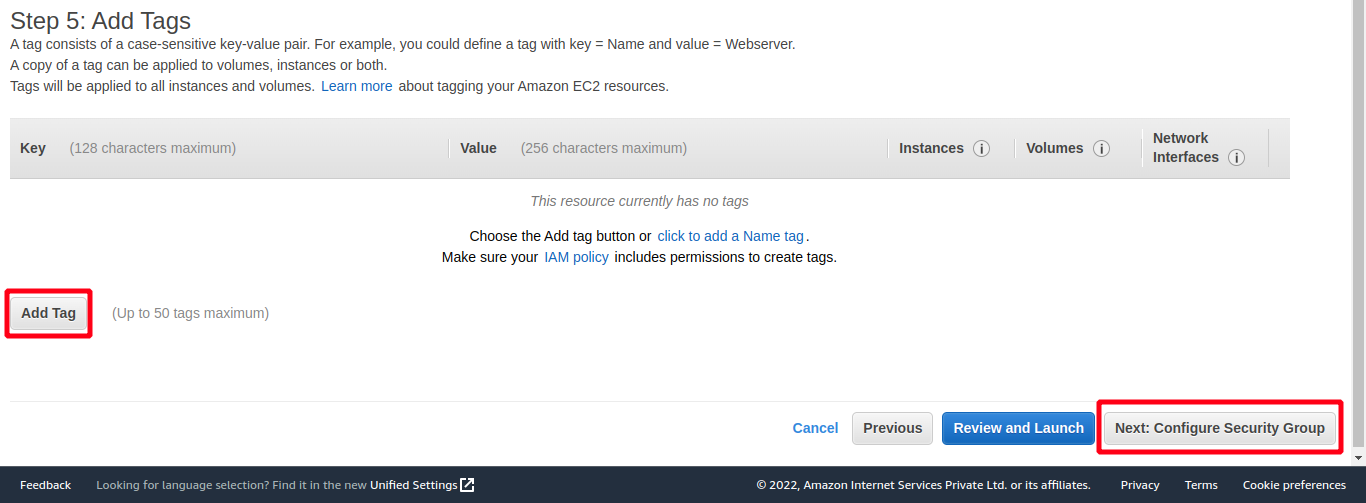
(optional) Adding tags. But adding appropriate tags is useful.
-
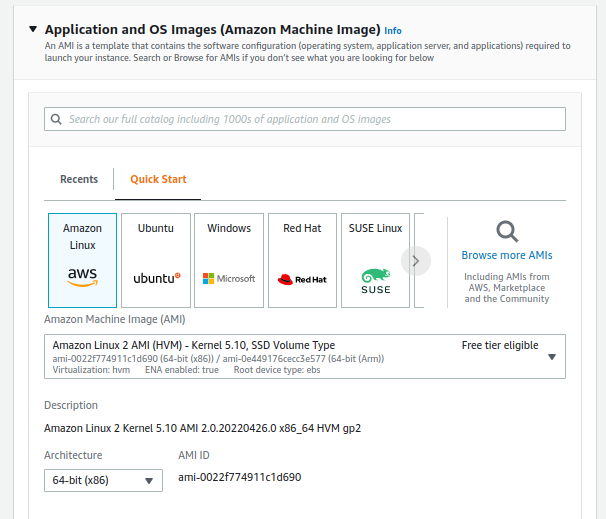
Select your desired Operating System.
-
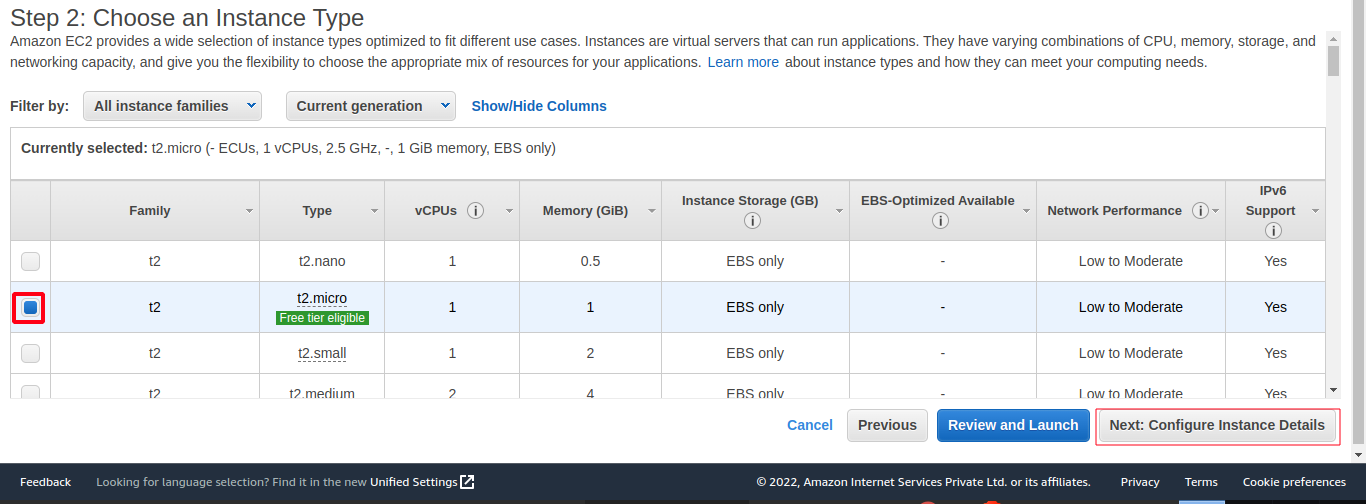
Choose your Instance type.
-
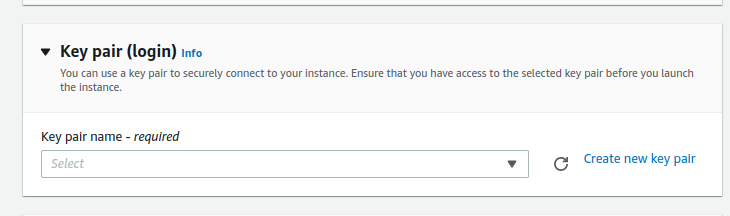
(Optional) Creating a Key pair. You can provide an existing Key pair, or you can create one if needed, or you can create a Key pair later. Key pair provides remote access to your EC2 instance using Terminal or Putty from your machine.
-
Network Settings. You are good to proceeds with defaults, or you can build your requirement.
-
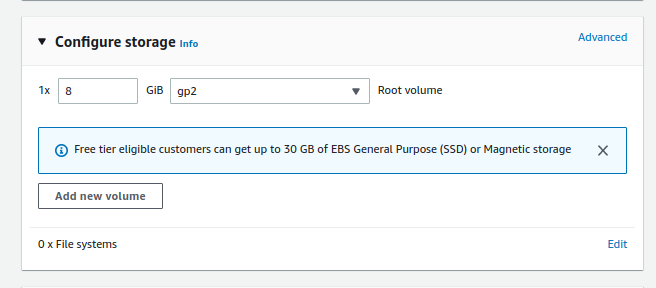
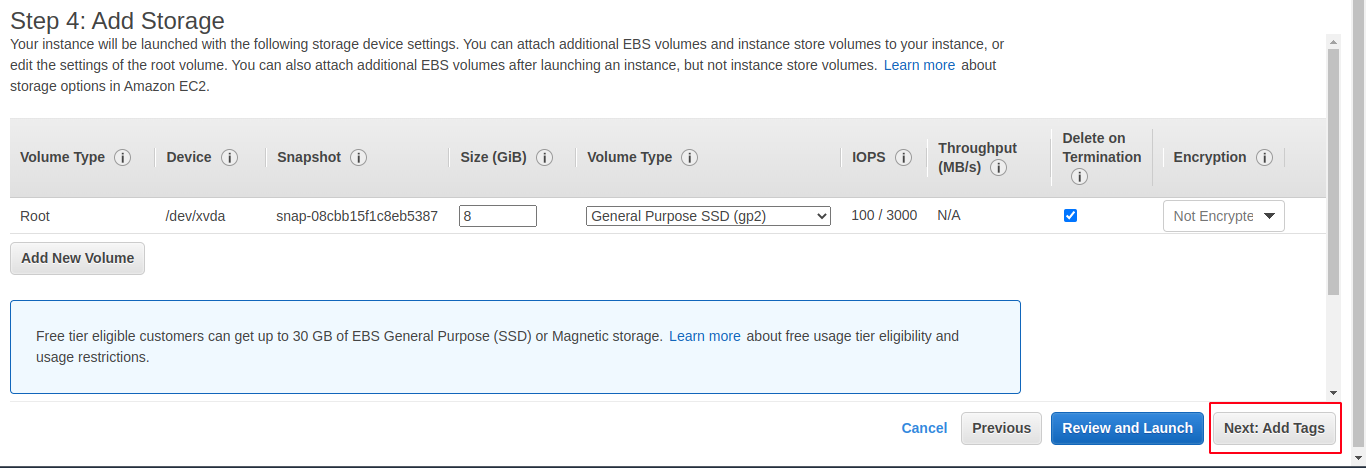
Configure Storage.
-
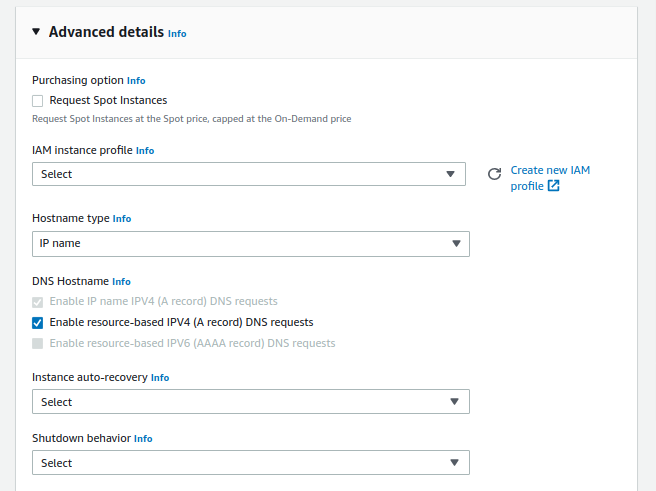
Advanced details. Good to go with defaults or can be tweaked per requirement.
-
One step to launch your EC2 instance. Tip: Check all your configuration, before hitting Launch Instance button.
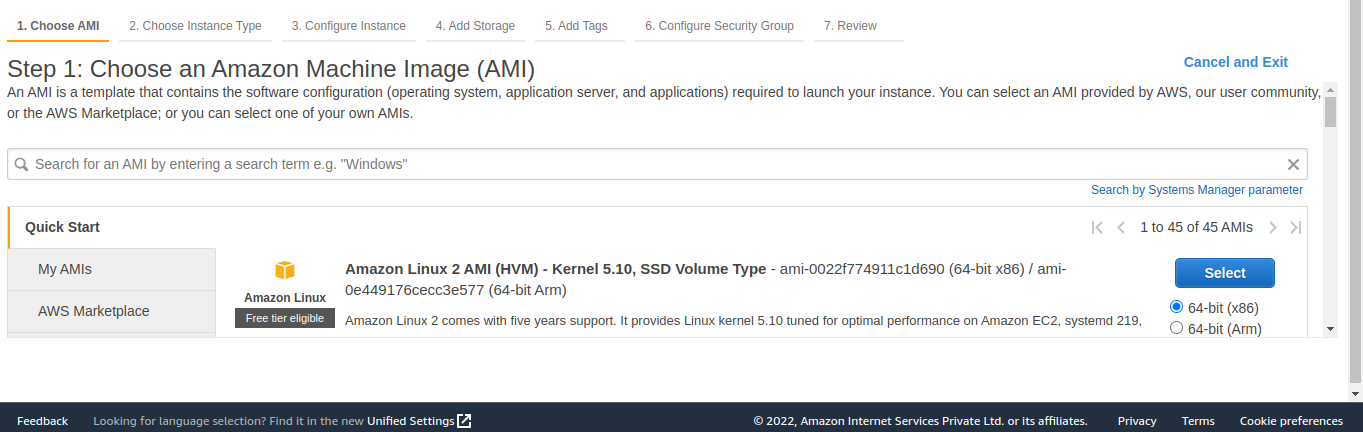
b. If user is in Old Experience.
-
Choose Operating System.
-
Choose Instance type.
-
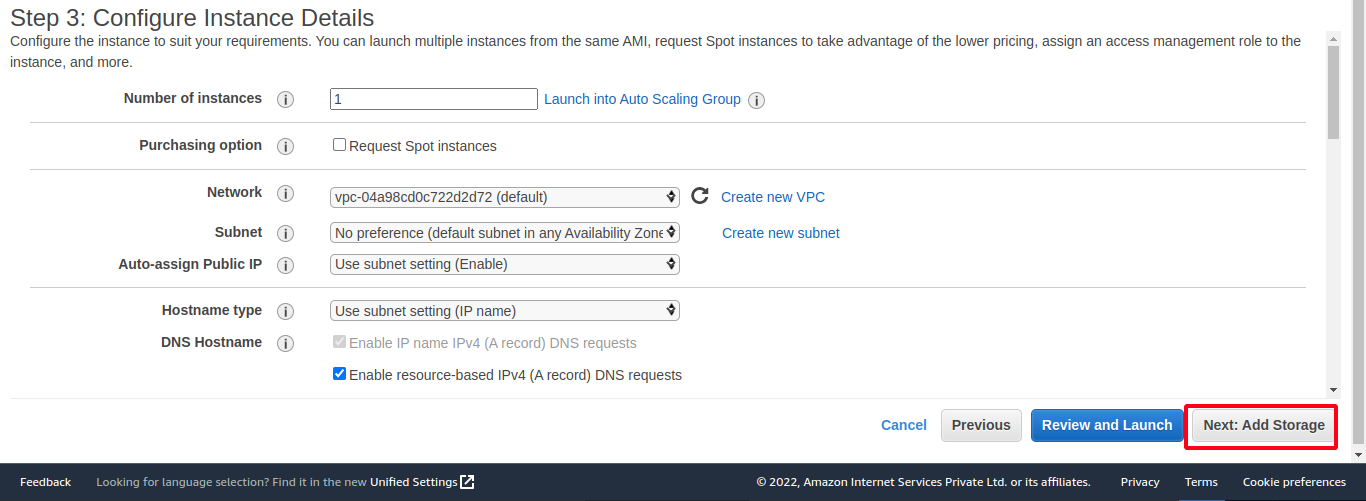
Configure Instance details.
-
Add Storage.
-
(optional) Adding tags. But adding appropriate tags is useful.
-
Configure Security group.

-
Review your configuration and hit Launch.
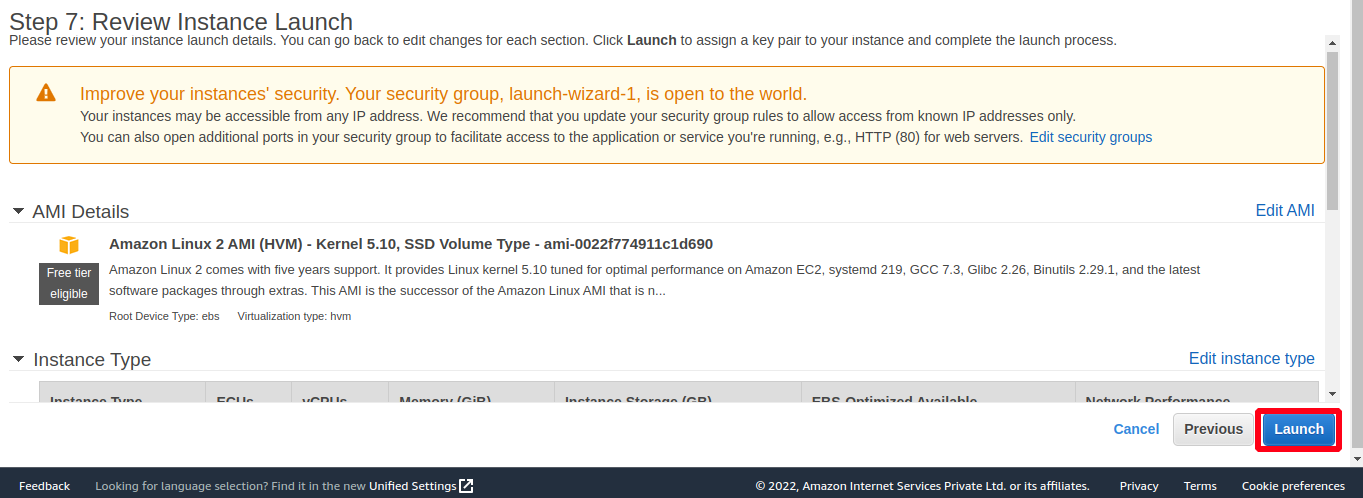
c. Voilà!!, you launched your EC2 instance.
-
-
Types of various EC2 Instance, and it's purpose #
- General Purpose
- This type of instance is an all round performer. It covers compute, memory and networking areas and can be used for different kinds of work loads.
- Suitable for most of the use cases based on selected configuration.
- Ex: Web Servers, development environments like development, testing, QA, etc.
- Compute Optimized
- Compute Optimized instance is preferred for high performance workloads that require high amount of computational power for delivering the best performance.
- Ex: Running batch jobs, High performance tasks, etc.
- Memory Optimized
- Memory Optimized instance is used to for performance intended works.
- Ex: Caching, Data analysis, etc.
- Accelerated Computing
- Accelerated Computing instance offers GPU's. So, it enhances the computational tasks.
- Ex: Machine Learning tasks, etc.
- Storage Optimized
- Storage Optimized instance offers fast read/write speeds and is ideal for frequent data operations task.
- Ex: Accessing/ Inserting data from/to Database, etc.
I am an SRE. I'm a continuous learner of DevOps, AWS, Terraform. Furthermore, I'm interested in OpenSource and writing Technical blogs.
Get new posts in your inbox.
Spotted a typo or want to improve this post? Edit on GitHub →